
These days many of us are trying to find ways to pay our neighbors without using cash. When you learn how to set up a Venmo account and make a payment, it will be much easier to pay for the supplies that they are picking up for you, and may save you a trip or two to the post office to mail off checks.
Venmo can be used to make a payment from your checking account or credit card to any other person who also has a Venmo account. You only need to know their user name, not any of their banking details. Venmo is owned by PayPal, one of the most well known names in online payments.
So let’s get a Venmo account set up. To do this, you will want to use a smart phone (we will show the example on an iPhone, but it can be an Android), and either a checking account or a credit card number. There are no fees for normal usage when you pay or receive money via your checking account. If you use a credit card, there are fees, which we will look at later. It is easier to add a checking account if you have an online account and know how to log in, but we’ll get to that in a minute too.
Download the Venmo App
Open the App Store and type in Venmo. The blue background with a V is the app we are looking for. It is free, so click on the word GET.

Now locate the app on your phone and tap it to open.

The opening screen shows some artificial transactions. To create a Venmo account, you will either log in using a Facebook account, or with an email address. We strongly recommend using your email address. The more accounts that are tied to a particular application, such as Facebook, or Google, the more personal information you are allowing those companies to access. Since it isn’t necessary for you to share your Venmo information with Facebook, we recommend you create a sign in with your email address.
Set up a Venmo account

Fill out this form and click Next. It will show up in color as soon as you have filled in the form.

The next several images are the fee structure for Venmo. It is important to read them. The most important take away is that there is no charge for you to exchange money with another person if you are using your checking account.
Fees


User Agreement and Privacy Statement
Please read the User Agreement and the Privacy Statement before you proceed.


The next step is to verify your cell phone number. Type it in here and click Send Code.
Verify Phone

You will receive a code on your phone which you will enter in Venmo. The next step is to choose a user name. Venmo will supply one, but you are free to choose something else. It will tell you if the name you want is taken, so try a few things until you find one that you like that is available. Then click on Done.
Using Venmo

You do NOT need to connect Venmo to Facebook and we would strongly recommend that you don’t.

You also do NOT need to connect your contacts to your Venmo account. Unless you expect to send and receive money from a lot of different people who are probably in your contacts, this will not usually save you much time and exposes all of your contact info to Venmo. Click Next.

And then it asks again. We recommend Don’t Allow, unless you have a particular reason to want this.

Stick with it, there are just a few more pages about Privacy. The dots on the bottom show there are more pages of this type of information. Swipe from right to left to see each one.


Making a Payment
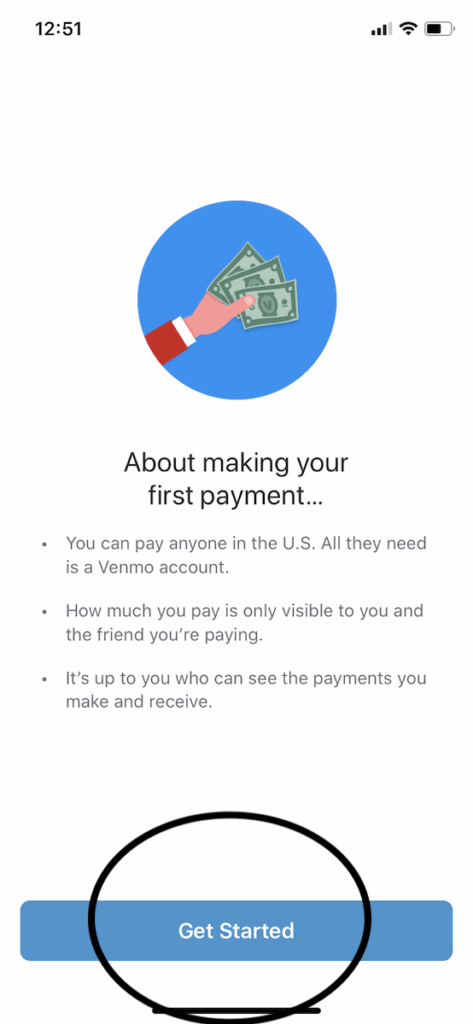
And now you are ready to make your first payment on Venmo. Click Get Started.
You can log into your online checking account, or enter routing number and account number, or you can add debit or credit card information. Any of these will work. If you choose the routing and account number method, the verification will take up to a couple days.
Click Add a Bank or Card.

We are going to add a checking account by using the bank log in information. Click Continue.

If you don’t see your bank’s name, you can type it in the search bar.

You will now log into your bank using the same credentials you would use to do online banking. You bank may have several steps of authorization.

Venmo notifications could be information about payments received or requests for payment. You can change your notifications at any time in your Setting menu.

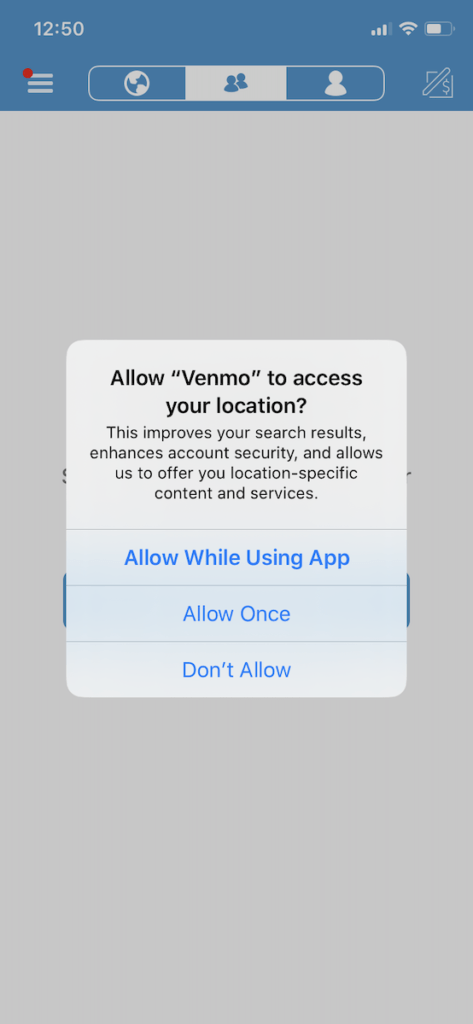
Venmo does not need to know your location, and we always recommend having location services turned off for any app that does not strictly need it.
Although this screen looks like you need to either choose to connect to Facebook or to your Contacts, by clicking on the globe icon we can go to the make a payment section.

I’m sure you’ve noticed the redundancy of this question.

To make a Venmo Payment –
Click on the globe icon.

When you are going to pay someone with Venmo, they will tell you their user name. You will type it in this section. Over time this list of recipients will grow to show all of the people that you have made or received payments from.

You will then add the amount, and a description of why you are paying them.
Who can see a payment?
At the bottom right of this screen you can see the word PUBLIC. This means that the payment information is going to be made publicly available in Venmo.

To change transaction to Private, because no one else needs to see anything about these payments, click on the word Public and choose Private instead.


This is a summary of your transaction. If it looks correct, click on Pay Name Amount in green at the bottom.

The screen shows that it is processing the payment.

And you will be returned to the home screen. To review you transactions, click on the two heads in the center.

This is a summary of your transaction.

Congratulations!! You have set up a Venmo account and made a payment. If you have any problems with this process, just send us an email or give us a call and we’ll try to help you.
For more information about Venmo, visit www.venmo.com.


Pingback: How to Use Person to Person Payment Methods - SDM Foundation
Pingback: make a venmo payment - bankwatches.com